Showing posts with label how to. Show all posts

Wednesday, July 23, 2014

DIY Rain Chain!

Contrary to this summer's weather, it is usually quite rainy here in Washington...

We put a lot of importance on rain management...
AKA: gutters.
They're a necessary ugly.
So this summer, as I spruced up the back porch,
I decided to replace one of our more dispensable gutters with a rain chain.
I've seen many rain chains online and in stores for upwards of $100...
REALLY?
$100 to manage dripping rain? 
Seemed a bit steep to me!
So, as usual, I decided to make my own.
Here's what my gutter looked like before...
Isn't it lovely?  No?  
I agree.  Ugly...Dirty...Blech!
Here's what it looks like now...  
If you'd like to make your own, it's very, very easy.  
Here are the cliff notes...
What you'll need:
Vintage little tin jello molds (hole drilled into the bottom of each)
Strong, yet pliable wire (I had some electric fence wire, I have no idea why we possess electric fence wire...no clue whatsoever)
Chain  (I bought 5 1-foot lengths of chain - you may need more if your chain needs to be longer -from Home depot...the home depot guy was very kind to cut the lengths for me.  There is no way on earth I could have done that at home.)
Binder rings (yes, binder rings)
To attach the tart tins to the chain, I made connectors out of wire like this:
I put one binder ring through one loop and stuck the other side through the tart tin and attached another binder ring...attaching chain to the binder rings as well and closing them.  Voila.  Repeat the same thing using all of your chain and tins.  All of the tins should face the same way.  Here's a detail of how I did it...
Now to attach it to the gutter...
I took off the ugly gutter and used one of these, set into the gutter opening, to attach the chain so that it comes out of the top of the now open gutter.  Your gutter may be different than mine and you may need to buy a different piece to make it work...this cost about a buck at Home depot.  There are very elaborate and fancy "rain chain adaptors" that you could buy for MUCH more...but why would you do that?
I added some colorful glass crystals because I thought it needed a certain je ne sais quoi...and the crystals were exactly what it needed!
I made this chain yesterday and after weeks and weeks of sunshine (no complaints here!), it's raining today.  I'm happy to report:  The rain chain is doing it's job!  

Sunday, March 16, 2014

DIY - A Treadmill Desk!!


In my quest for fitness, I've come to a realization...I'm 48.  I am at war with my body...more accurately, my body is at war with me...even more accurately, fat cells are clinging like a sea urchin to rock, like a magnet to a refrigerator...fleas to a dog...it's getting ridiculous folks...so yesterday, as I sat on my sofa, complaining about age and how I can hardly eat a banana without gaining a pound, it occurred to me.  I was just sitting on my sofa.  I had been writing, reading emails, commenting on friends' Facebook posts, looking for a mother-of-the-bride dress, perusing Pinterest and contemplating my evil fat cells all the while, sitting sedentary. I realized that my bum was starting to ache from all the sitting...so I suggested to my husband that we go for a walk, which we did.  That was better...until I came home and plopped down for a good long sit...again.  It was then that it struck me...I immediately shifted on my sofa and googled "treadmill desk".

And there, right before my very eyes was a hideous, room-hogging contraption that spanned several square feet of treasured space at the low, low cost of $500 (which was one of the cheaper models).  I didn't need an entire office at my treadmill, just a flat surface on which I could pin amazing things on Pinterest or check email or, most importantly, write, while walking at a leisurely pace.  The idea isn't to do a workout while writing, it's to NOT SIT while writing.  I googled "how to make a treadmill desk" and I found this gem:  It's a 3-minute how-to on building your own simple treadmill desk!


AMAZING!  I decided then and there that I would make my own!

I am writing this post from my new treadmill desk...while walking...not sitting on my bum!

If you don't want to watch the video, here's how I made mine...it is a little different from the video because my dad had a better idea...I prefer an easily removed desktop that can be lifted off and set aside. My dad, being the woodworker extraordinaire that he is, helped me make this but it is a simple design and that you can easily reproduce!
I started by measuring the width of my treadmill...both inside the side bars (30") and outside the bars (33").  I also measured the width of the actual bars (1 1/2").
I went to Lowe's and bought an inexpensive shelf board.  Mine measured 36" long and 10" wide.  It cost about $7.
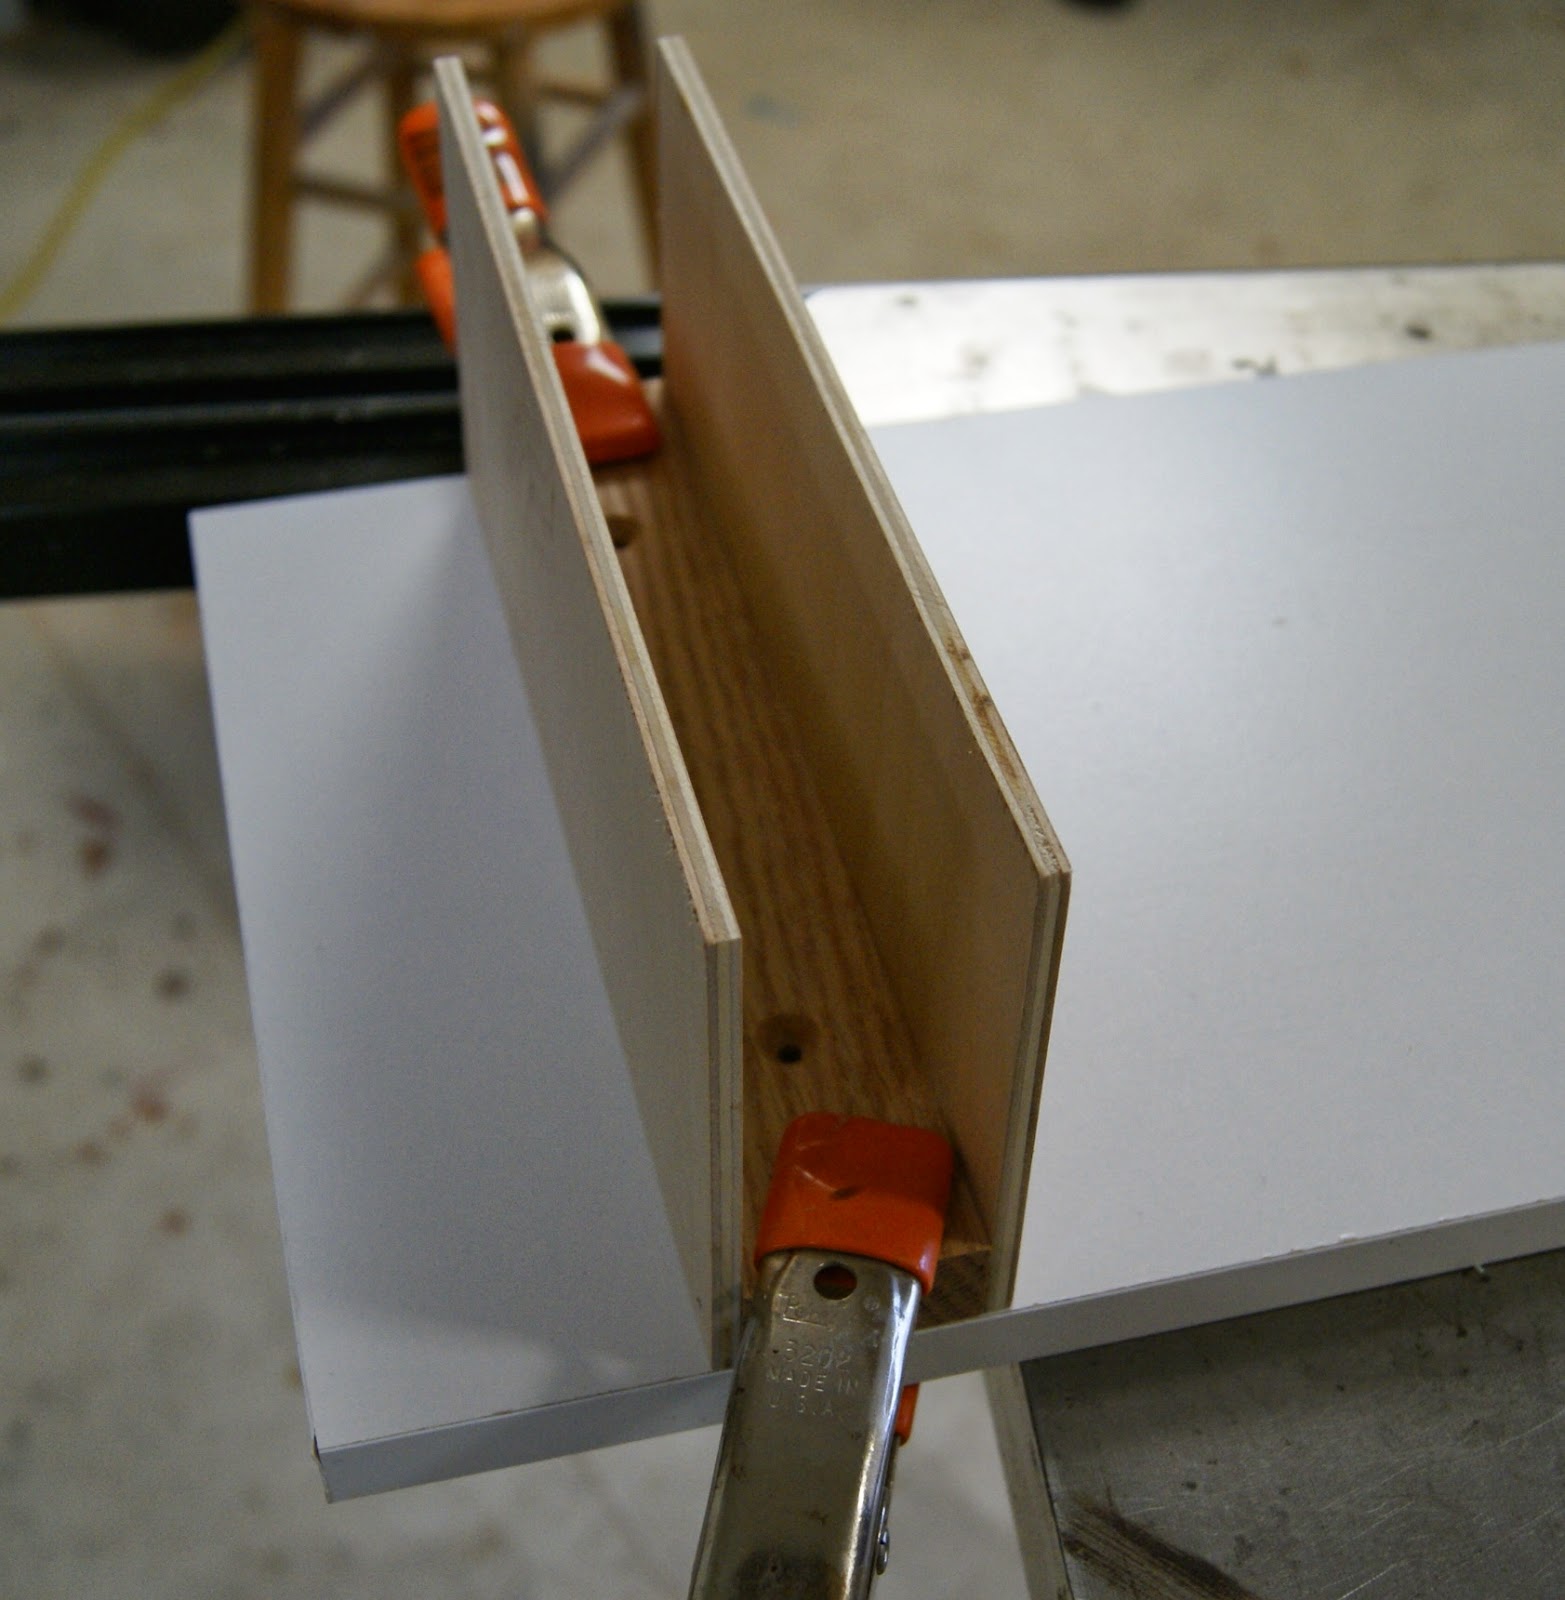
We used scraps to make the fittings...we cut the scrap boards into 9 3/4" lengths, 1/4" shorter than the width of the shelf board.


Next, we made the brackets...glueing and then nailing - or pinning with a nail gun - the longer sides to the bottom which happened to measure  1  1/2" - the width of the bars.
Once we made the brackets, we measured twice...for insurance...the width of the inside span of the treadmill arms on the shelf then secured the brackets in place with clamps.  I had a funny feeling, and I've learned never to ignore a funny feeling, so I opted to bring the shelf home to check our placement before screwing it in permanently.  Good thing I did...we had the brackets situated on the wrong side of the line.  I moved them over, re-applied the clamps and screwed them into the shelf.  PERFECT!  The shelf fit securely over both sides of the rails...


I love my new treadmill desk!  It was very inexpensive...even if I hadn't had access to wood scraps I can't imagine it would have cost more than 15 bucks to make!


It doesn't move as I walk because I'm not walking quickly.  It's quite easy to type and walk...it gives a whole new meaning to multitasking!  I did need to elevate my computer a bit...on a book...my hand started to ache a little.  Once it was elevated, it was fine...so...something to tweak in the design...or perhaps I just need to keep a book handy.
One thing I should mention...I had worried about the desk slipping off of the handles...since they are both smooth surfaces and there is some vibration as I walk.  Mine doesn't slip, it's snug enough, but I had a plan if it was looser and that is to add some of that rubberized material that keeps rugs from slipping on the floor...or that you put in your cupboards to keep dishes secure...that would keep the two smooth surfaces from sliding against each other.  Just fyi.  :)

As I've written this post, I've walked over 2 miles and have burned 295 calories!!!

THAT.  JUST.  HAPPENED!!!

Saturday, March 15, 2014

Beadboard Flag Project!

I've been wanting to make one of these for years...why haven't I?  I don't know...short attention span...other projects on top of the list...the stars didn't align until now...(pun intended)
Here's the real reason why I finally decided to make my flag.  I was in my master woodworker dad's shop the other day,...admiring a couple of projects he was working on.  Out of the corner of my eye, I spied some beadboard leaning against some other wood.
"Whatcha doin' with that beadboard?" I asked, imagining a flag painted on it.
"Nothing, you want it?" he ventured
"YES!" I answered, jumping up and down with delight, "THANK YOU!"
"No, thank YOU!" he said, quickly handing it to my husband to load into the car, before I changed my mind.
My husband sighed...he was probably thinking about the vintage door I bought at a yard sale that sat in our garage for 5 YEARS before I FINALLY turned it into a very cool headboard for our bed.
I'm happy to report that the beadboard sat in the garage for a total of 2 days before I made the flag.  That's a personal record, folks.  I've never moved on a project so quickly!  :)

The first thing I had to do was cut the beadboard to the right size.  I love beadboard for this project because it has built-in guidelines!  I counted 13 stripes for the width and doubled that measurement for the length of the flag.  Then I cut it to size! 
                                               

I spray painted it an off-white...and not perfectly.  There were little areas where some wood showed through.  I'm going for a vintage look...a weathered old flag!  I taped off a square in the upper left corner for the blue part...and painted it...not perfectly.  
I was doing this on the back porch and kept running to the front porch to look at the flag hanging there for reference!  I measured with my eyes...not with a ruler!  I love projects like this because I'm not a perfectionist...I always make mistakes and hate to measure and re-measure and do perfect detail work.  Maybe that's why I'm such a fan of folk art!!  


After the blue part was dry, I taped off the stripes.  I used barn red for the stripes...and once again, I had to run to the front porch to peek at the flag...the stripes start and end with red...fyi.  
                                                                                                                      

Once the stripes were dry, I peeled off the tape and sanded down the whole flag a bit.  I liked it much better after the sanding.  It looked a little beat up, like it had seen some weather and action!


Then it was time for stars...I'll admit, I was a little nervous about the stars.  I am not a perfectionist, but I do want the starts to look somewhat star-like and I don't want them randomly plopped onto the flag.  I decided to use a star shaped sponge to make my stars.  Finding a compressed sponge in my stash, I drew a star shape on it with a pencil and cut it out.  It was lopsided and a little sad, but so what!
I ran to the front porch to examine the stars.  Horizontally, there were 5 rows of 6 stars and 4 rows of 5 stars...starting and ending with rows of 6.  I placed all of the rows of 6 first, then filled in with the rows of 5.  I did my best to make the rows somewhat straight and spaced evenly.  They turned out perfectly imperfect!


Since I'm not one to leave well enough alone, I had to antique it.  And since I didn't have any stain available, I watered down some brown craft paint.  That had an unintended consequence which I will point out in a moment.  I painted the brown wash over small sections and wiped it off...just like stain. It collected in the grooves which I liked!  The unintended consequence was that some of the blue paint and stars rubbed away with the brown wash.  At first I was horrified, then I decided that I liked it...it's quite weathered and wonderful!


A coat of sealer and hangers on the back and I'm all done!  I'm super happy with it and it feels good to check this project off of my mental list of projects I've always wanted to make!


This is one of those instant gratification projects that moves quickly with the majority of the effort going into waiting for things to dry...think of it as a chance to practice patience!  
Happy Creating!

Saturday, June 22, 2013

Lavender Shortbread....a little piece of heaven!
I added about a tablespoon of lavender to my favorite vanilla butter shortbread recipe...
 Pressed it into a fancy schmancy pan and pierced the back with a fork...don't forget to grease your pan!
 Bake at 325° for 30 minutes...
 Flip the pan over onto a plate...
 Let it cool...or not...we couldn't wait...
Just look at that perfect brown edge...it tasted like carmel...and lavender...

Here's the recipe!

Lavender Shortbread
1/2 cup butter (no substitutes.  use butter.  just do it!)
1/3 cup powdered sugar
1 cup flour
1 tsp vanilla
1 tbsp lavender buds (use culinary lavender, or lavender that has not been exposed to pesticides)

Cream butter, add sugar and vanilla.  Mix in flour and knead until thoroughly mixed.  Knead in lavender.  Press into a greased fancy shortbread pan or use a pie plate.  Prick the back with a fork all over.  Bake at 325° for 30 minutes.  Turn out onto a plate, let cool (or not) and slice and enjoy!